


Specific key points for maintaining textured rollers-how many are you doing right?
Daily Maintenance (Every Shift / After Each Ink Change)
1. Immediate Cleaning. After production or an ink change, the screen roller must be cleaned immediately to prevent ink from drying in the mesh holes. This is especially important when the roller is hot, as dry ink sets faster and is harder to clean.
2. Cleaning Method. Ultrasonic cleaning is preferred: use a professional ultrasonic cleaner (frequency 40kHz, temperature ≤50°C) (as shown in Figure 1) with an eco-friendly special cleaning solution. Its cavitation effect can thoroughly remove dirt from the bottom of the mesh holes without causing damage. Detailed operation is as follows:
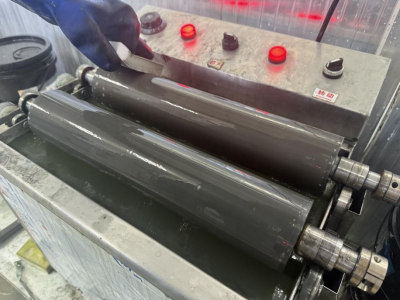
Figure 1 Ultrasonic cleaner cleaning anilox roller
(1) Mix the cleaning solution with water at a 3:1 ratio (the concentration varies with different brands, so the ratio may differ). The solution level should contact the roller by about 5mm. Wear rubber gloves while cleaning, and use a nano sponge to wipe the roller surface, first removing the ink on the roller surface. Then soak the roller in the solution to further soften any remaining ink in the cells. Ultrasonic cleaning can also be used for deeper cleaning. The rule for ultrasonic cleaning is: regardless of how long you soak it, the ultrasonic generator should be on for no more than 3 minutes. For anilox rollers with over 1000 lpi, keep it under 2 minutes; otherwise, long ultrasonic cleaning can seriously damage the roller. If cleaning isn't effective, first check the cleaning solution.
(2) After cleaning with the solution, rinse the roller thoroughly with water to remove any remaining cleaning agent (as shown in Figure 2).
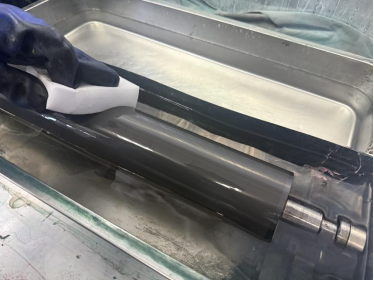
Figure 2 Wipe with clean water
(3) After rinsing with clean water, use a highly absorbent cotton cloth to wipe off the water on the roller surface. The roller surface will return to the gray-white color it had when it left the factory (as shown in Figure 3).
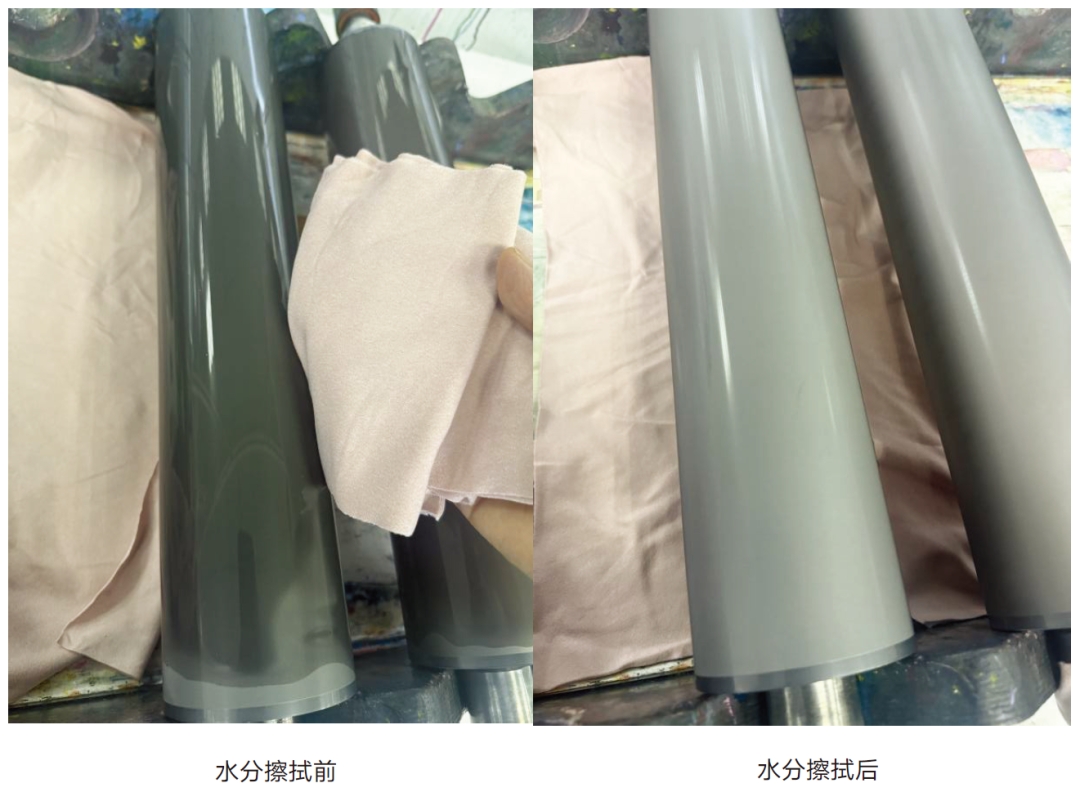 Figure 3 Comparison of the roller surface before and after wiping off moisture
If you don't have ultrasonic equipment, you can use a manual cleaning method. The specific steps are as follows: you can dip a nano sponge in a special cleaning solution and gently wipe along the circumference of the gravure roller. After cleaning, rinse with clean water. It's important to note that metal brushes or blades must never be used.
3. Short-term protection. If you stop work for a short period, you can keep the gravure roller in an inked state or loosen the doctor blade so that the roller surface is coated and kept wet with ink. Also, make sure to shield it from light (especially for rollers used with varnish or glue).
Deep maintenance (periodic / when poor ink transfer is noticed)
After using the gravure roller for a while or when poor ink transfer is noticed, it needs deep cleaning and professional inspection.
1. Deep cleaning. For rollers with dried ink or surface staining, you need to soak them in a strong deep-cleaning solution for a long time to soften the dried ink. Then, use ultrasonic treatment and a nano sponge for restorative cleaning. The detailed steps are as follows:
(1) First, clean the ink off the roller surface, then evenly apply a "strong deep-cleaning solution" or a "water pattern cleaning agent" over the roller surface, and wrap the roller with plastic wrap (as shown in Figure 4). This not only helps the cleaning solution soften and break down the ink in the cells more effectively, but also prevents the solution from evaporating easily, resulting in better cleaning.
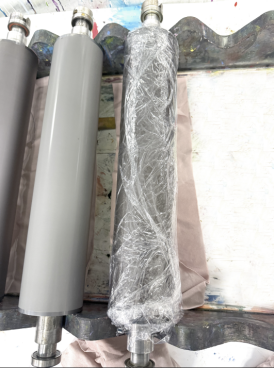
Figure 4 Wrap the roller with plastic wrap
(2) After soaking the roller for 3–4 hours, remove the plastic wrap and repeatedly wipe it with a nano sponge. You'll clearly see the residual ink on the roller surface being broken down. Then clean the roller thoroughly (as shown in Figure 5). Note that the degree of screen hole clogging can vary, so these steps can be repeated until the screen holes return to normal.
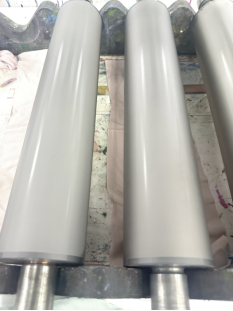
Figure 5 Cleaned Anilox Roller
2. Professional Inspection. Regularly (recommended every quarter) check the wear and blockage of the anilox roller cells using a high-powered microscope, measure the cell volume, and create a performance record for the anilox roller.
Storage Maintenance
1. Cleaning and Rust Prevention. After thoroughly cleaning and drying the anilox roller, apply a layer of special protective oil to both sides of the roller.
2. Environmental Control. The storage area for anilox rollers should be kept at 15–30°C with humidity maintained at 40%–60%.
3. Safety Protection. When storing anilox rollers, always cover them to prevent dust and avoid direct light. Avoid high temperatures that accelerate material aging or low temperatures that cause brittleness. Excessive humidity can cause the roller core to rust, while too low humidity may lead to material cracking. Also, keep the storage area away from corrosive chemicals like acids, alkalis, and organic solvents.
In summary, the author has explained some important points and precautions to consider during the use and maintenance of anilox rollers. Overall, as an indispensable component in flexographic printing, proper and organized management of anilox rollers can lead to significant cost savings for label printing companies, allowing the value of the rollers to be maximized.